
Are you struggling with PCOS/PCOD, withholding your stress and health because of your job or responsibilities? Are you upset about the state of your life? It feels empty and without a purpose. We can give you a clear solution with a step-by-step guide. Just read this blog, and one of your problems will be solved, and about the spiritual balance of your life, which can be solved with our other blog, “How Your Spiritual Growth Eventually Connects You to the Divine.”
So this blog is about the yoga poses you can do to make your problem easier to handle and eventually cure it. The spiritual practices of yoga can cure PCOD/PCOS. If you are interested, stay with me on this.
Research indicates a 6-week yoga intervention can reduce BMI, decrease ovarian volume, and improve regularity of menstruation. Our at-home yoga beginners can start their home sessions with these simple exercises and see the effect for themselves. PCOD yoga is not that hard for any beginner, but you should always remember
Disclaimer: Yoga is a supportive and complementary lifestyle practice for managing PCOD/PCOS symptoms and should not replace medical treatments. Consult a doctor or yoga instructor before beginning, especially if you have other health conditions too.
Yoga for beginners at home should not be a hassle if you have an instructor working with you. PCOS and yoga go hand in hand in treatment. So here are some of the best yoga poses for PCOS that are beginner-friendly
Note:- We want to inform our readers that this content is checked and backed by our certified yoga instructor, Ms. Monika Yadav
How to start yoga at home as a beginner?
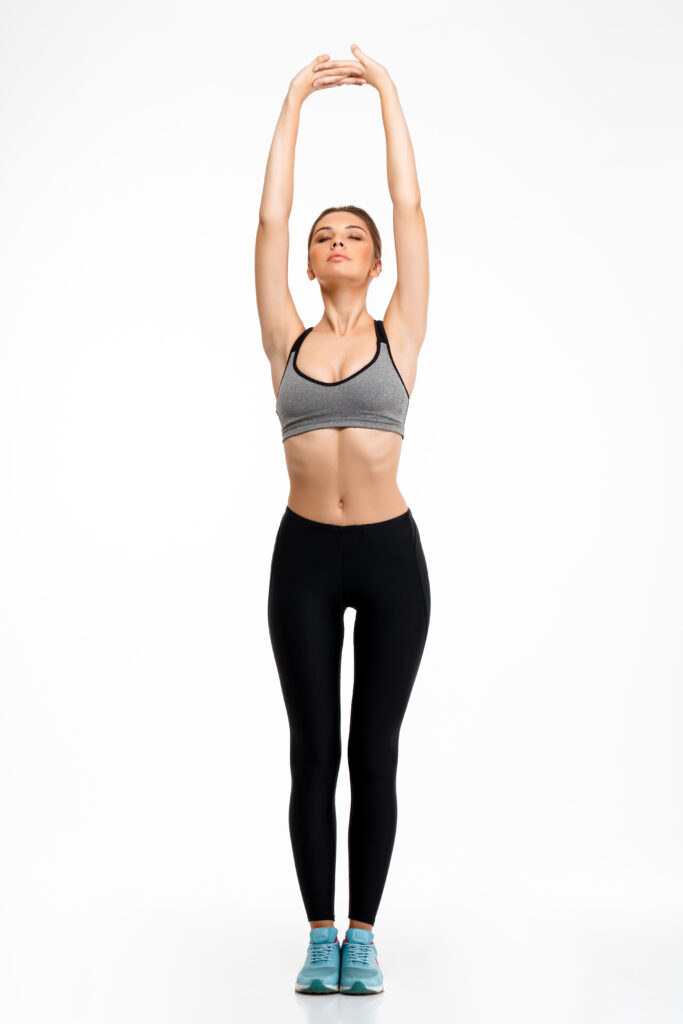
1. Tadasana
Tadasana looks simple, but it is the foundation of all standing yoga postures. It improves posture, balance, and body awareness.
Step-by-Step Practice
- Starting Position
- Stand upright with feet together or hip-width apart.
- Distribute weight evenly across both feet.
- Feel the four corners of the feet grounded:
- The big toe’s base
- Little toe base
- The inner heel
- external heel
- Engage the Legs
- Stretch your thighs gently.
- Without locking your knees, raise your kneecaps a little.
- Maintain a strong yet relaxed gait.
- Align the Pelvis
- Slightly align the tailbone downwards..
- Engage the lower abdominal muscles softly.
- Avoid arching the lower back excessively.
- Lengthen the Spine
- Imagine a rope pulling your head upwards.
- Keep the spine long and neutral.
- Chest open but not pushed forward.
- Arm Position
- Arms relaxed next to the body.
- Palms facing each other or a little bit forward.
- Shoulder Alignment
- Roll shoulders up → back → down.
- Keep the collarbones wide.
- Head and Neck
- Chin parallel to the floor.
- Gaze softly forward.
Breathing
- Inhale deeply through the nose.
- Exhale slowly and completely.
- Stay in the pose 5–10 breaths.
Key Benefits
- Improves posture
- Strengthens legs and core
- Develops body awareness
Creates grounding and stability
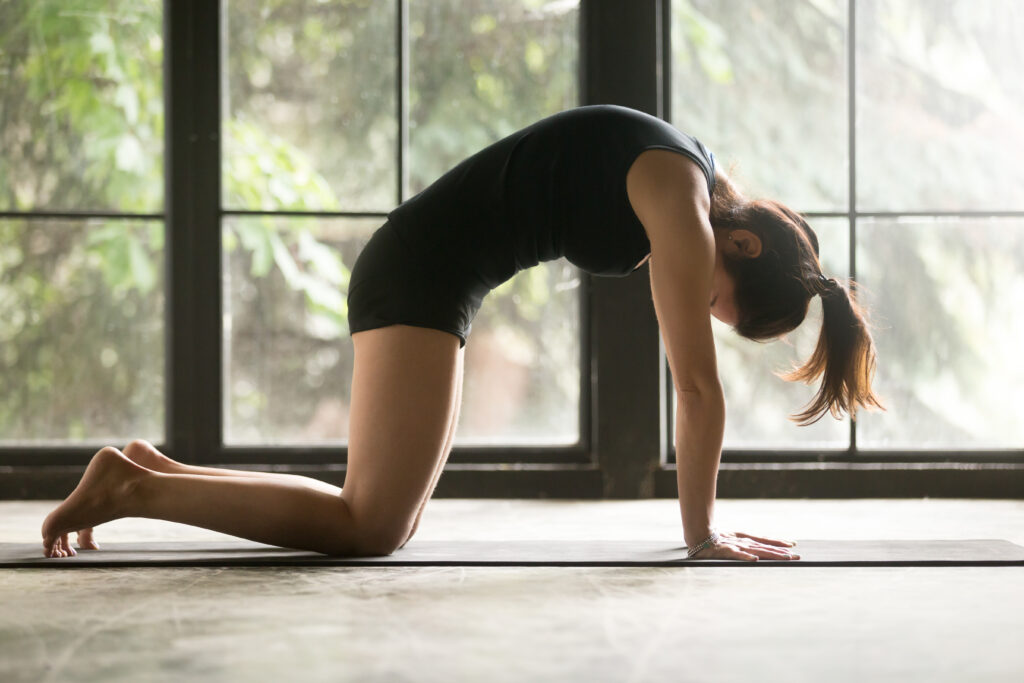
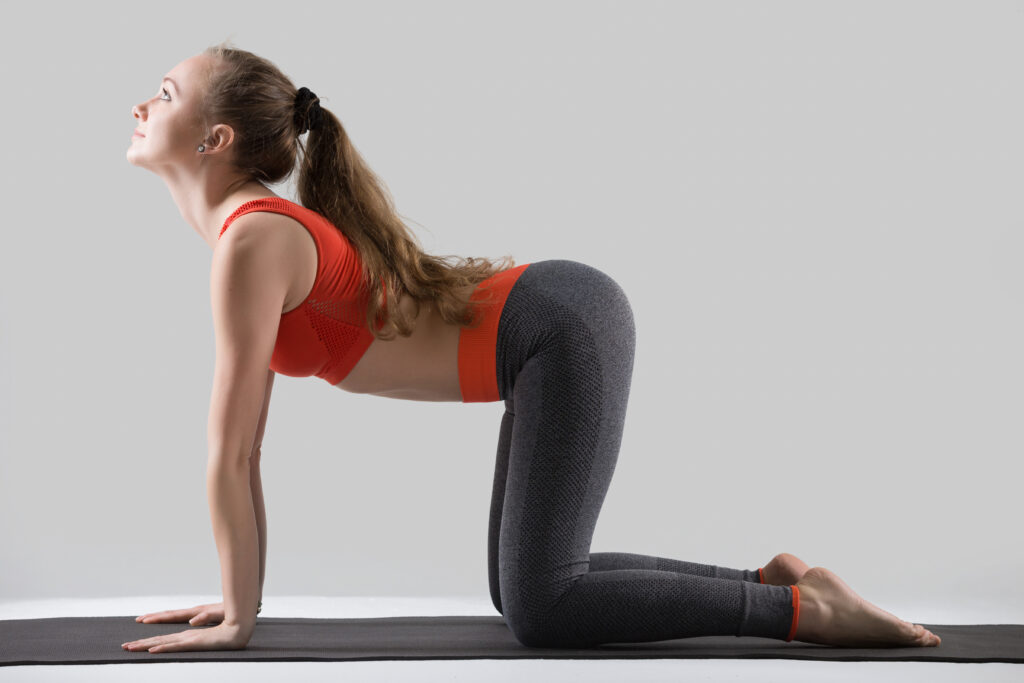
2. Cat-Cow Pose (Spinal Flow)
Cat-Cow is a gentle spinal movement that increases flexibility and relieves tension in the back.
Step-by-Step Practice
- Starting Position (Tabletop)
- Assume a position on your hands and knees.
- wrists directly beneath the shoulders.
- Knees directly under hips.
- Sit comfortably.
Two. Inhale while in cow pose.
- Take a slow breath.
- Drop the belly toward the floor.
- Lift the chest and tailbone upward.
- Look slightly upward (without compressing the neck).
A soft arch is formed by your spine.
Third. Exhale in Cat Pose
- Breathe out slowly.
- In the direction of the ceiling, round your back.
- The chin should be tucked into the chest.
- Draw the belly button toward the spine.
Your back forms a dome shape like a stretching cat.
- Continue the Flow
- Inhale → Cow Pose
- Exhale → Cat Pose
Move slowly with your breath.
Duration
- Repeat for 8–12 rounds of breath.
Key Benefits
- Improves spinal flexibility
- Relieves back and neck tension
- Massages the abdominal organs
Calms the nervous system
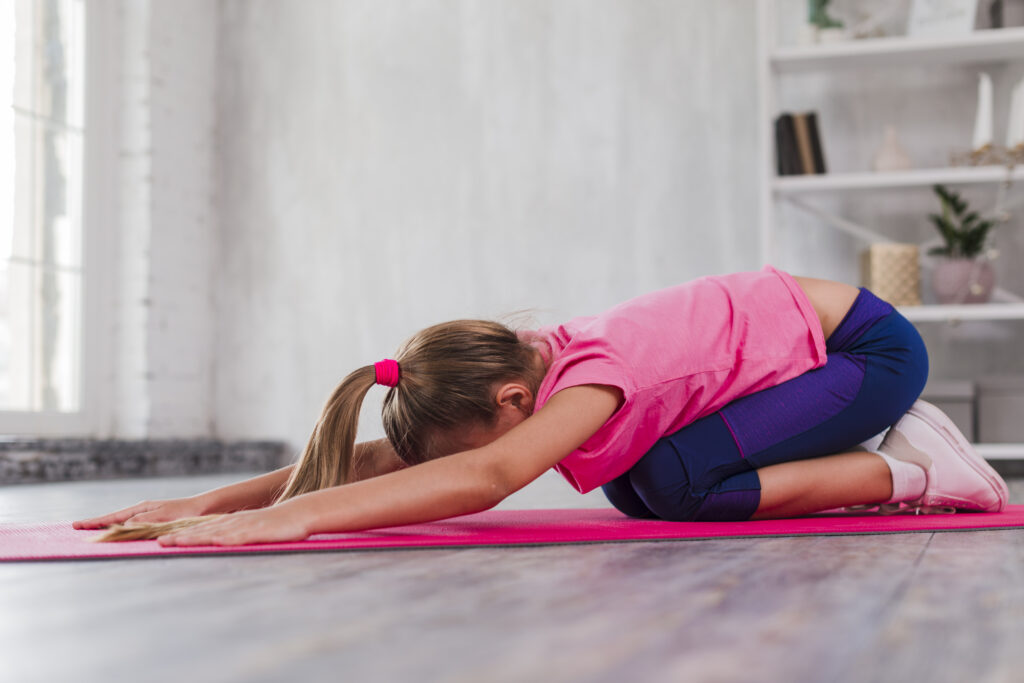
3. Child’s Pose (Balasana)
Child’s Pose is a restorative posture that relaxes the body and mind.
Step-by-Step Practice
- Starting Position
- Get down on your knees on the mat.
- Touching big toes.
- Knees together or slightly apart.
- Lower the Torso
- Slowly sit your hips back toward the heels.
- Fold the torso forward.
- Arm Placement Options
Option 1 — Active stretch
- Extend arms forward.
- Palms pressing gently into the mat.
Option 2 — Restorative
- Arms alongside the legs.
- Palms facing upward.
- Head Position
- Gently place your forehead on the mat.
- Put a block or pillow under your forehead if it doesn’t touch the floor.
- Breathing
- Slow, deep breaths.
- Feel the belly expand against the thighs as you inhale.
Duration
Stay 30 seconds to 2 minutes.
Key Benefits
- A lot of it calms down the nervous system.
- Stretches the hips, thighs, and spine
- Helps with stress and being tired
- Helps to calm the mind
Simple Practice Flow (Beginner Sequence)
- Start with Tadasana – 5 breaths
- Move to Cat–Cow – 10 rounds
- Rest in Child’s Pose – 1 minute
This short sequence gently awakens the body and settles the mind.
If someone wants to start at home yoga for beginners for PCOD / PCOS yoga, the most important thing is to begin gently and consistently. Hormonal illnesses like Polycystic Ovary Syndrome (PCOS) and Polycystic Ovary Disorder (PCOD) respond well to practices that improve circulation in the pelvic region, reduce stress, and support hormonal balance.
For beginners, Day 1 should be simple, calm, and not overwhelming. The goal is not perfection in poses, but creating a rhythm with the body and breath.
Below is a beginner-friendly Day 1 PCOD/PCOS yoga routine.
How to Start PCOD / PCOS Yoga at Home (Beginner – Day 1)
1. Start With Gentle Breathing
Begin your practice by sitting comfortably on the mat.
Practice Kapalbhati Pranayama
How to do it
- Sit with a straight spine.
- Take a deep inhale.
- Start short, forceful exhalations through the nose while the inhale happens naturally.
- Focus on pushing the navel toward the spine with each exhale.
Duration
- 20–30 breaths
- Rest
- Repeat for 2 rounds
Why it helps
- Stimulates metabolism
- Activates abdominal organs
- Supports hormonal balance
Gentle Warm-Up
2. Bitilasana (Cow Pose)
How to practice
- Come to the tabletop position.
- Wrists under shoulders, knees under hips.
- Inhale and drop the belly down.
- Lift chest and tailbone upward.
Benefits for PCOS
- Improves blood flow to reproductive organs
- Releases tension in the lower back
Practice 6–8 breaths.
Main Asanas for PCOD / PCOS
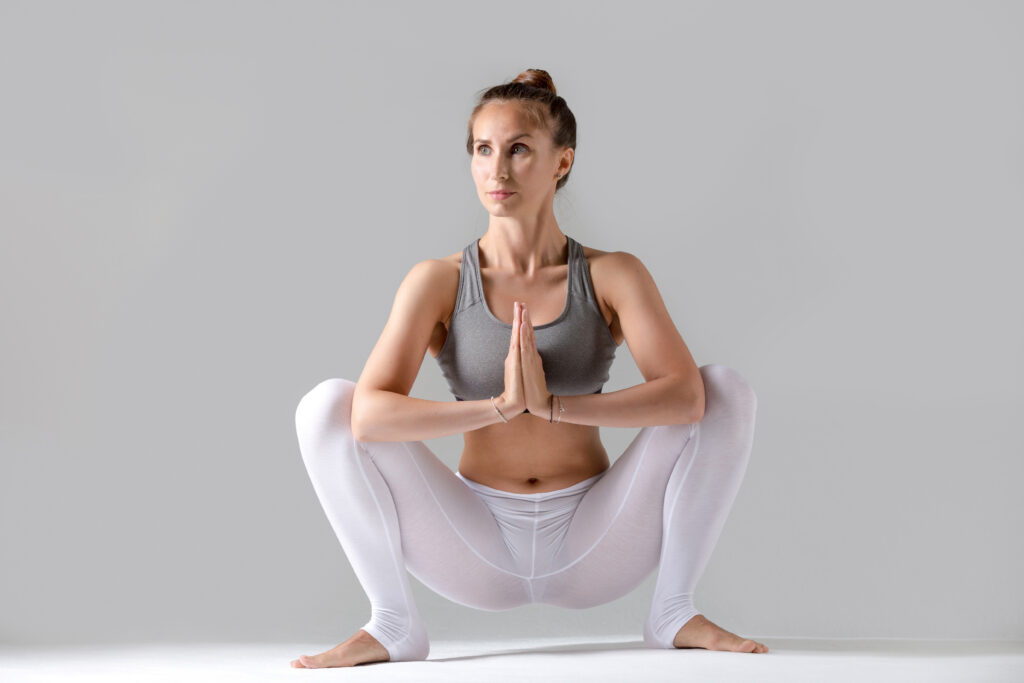
3. Malasana (Yogic Squat)
How to do it
- Stand with feet slightly wider than hips.
- Slowly lower into a deep squat.
- Bring palms together at the heart.
Benefits
- Opens the pelvic region
- Improves digestion
- Stimulates reproductive organs
Hold for 5–8 breaths.
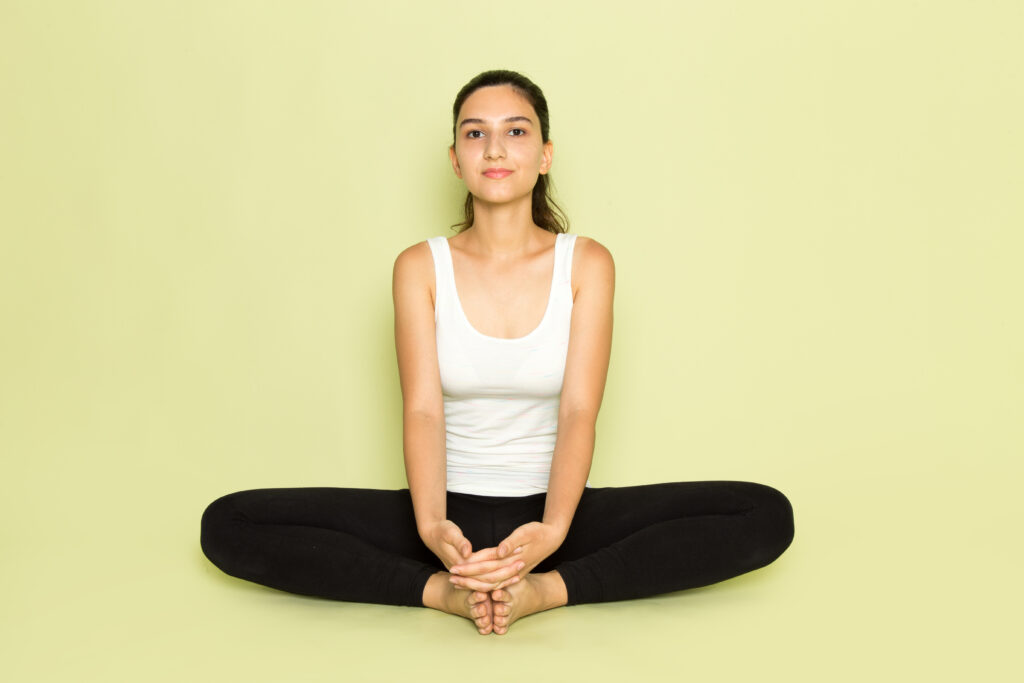
4. Baddha Konasana (Butterfly Pose)
Steps
- Sit on the mat.
- Bring the soles of the feet together.
- Hold your feet with both hands.
- Gently move knees up and down like butterfly wings.
Benefits
- Improves blood circulation in the ovaries
- Helps relieve menstrual discomfort
Practice for 1 minute.
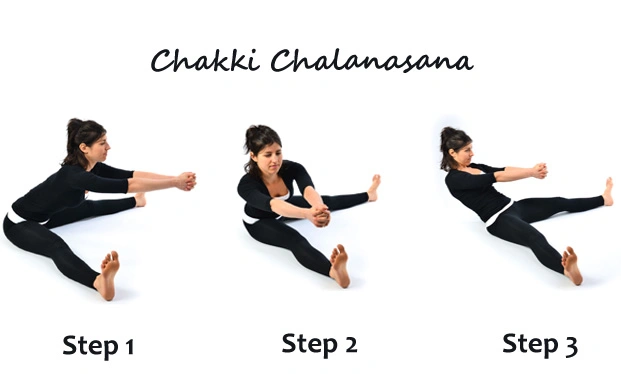
How to do it
- Sit with legs wide apart.
- Interlock fingers and stretch arms forward.
- Move your torso in large circular motions as if grinding a mill.
Benefits
- Activates abdominal muscles
- Stimulates the ovaries and uterus
Do 8 rotations clockwise and 8 anti-clockwise.
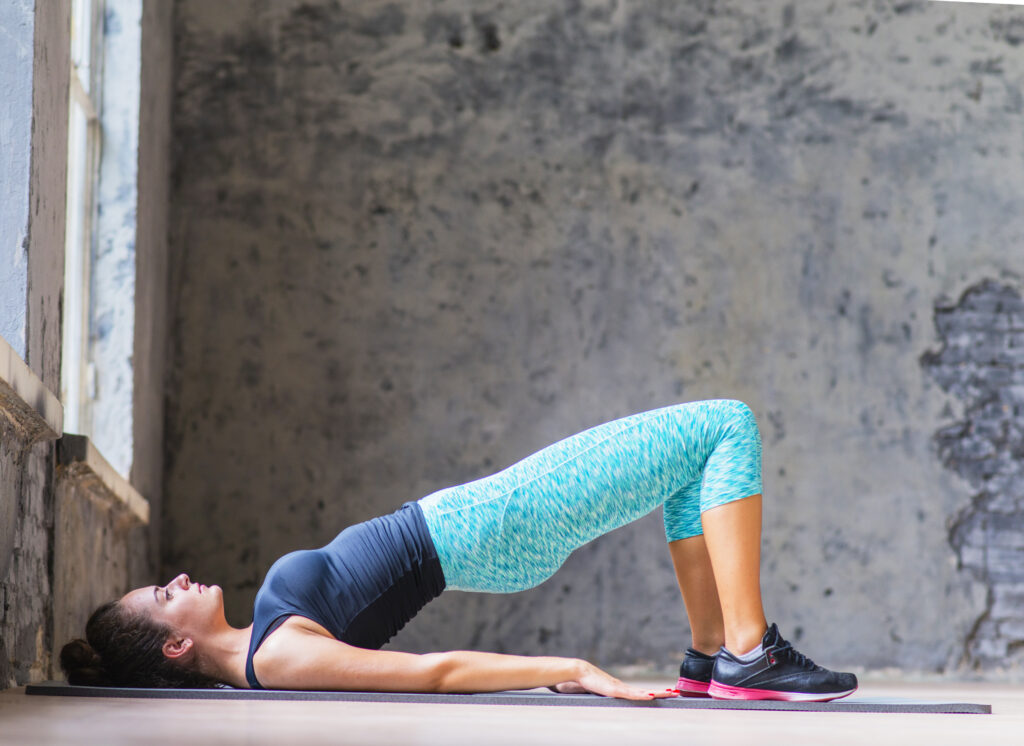
6. Setu Bandhasana (Bridge Pose)
Steps
- Get on your back.
- Bend your knees and maintain your feet hip-width apart.
- Put your feet on the mat and lift your hips up.
Benefits
- Improves blood circulation to pelvic organs
- Supports endocrine glands
Hold for 5 breaths.
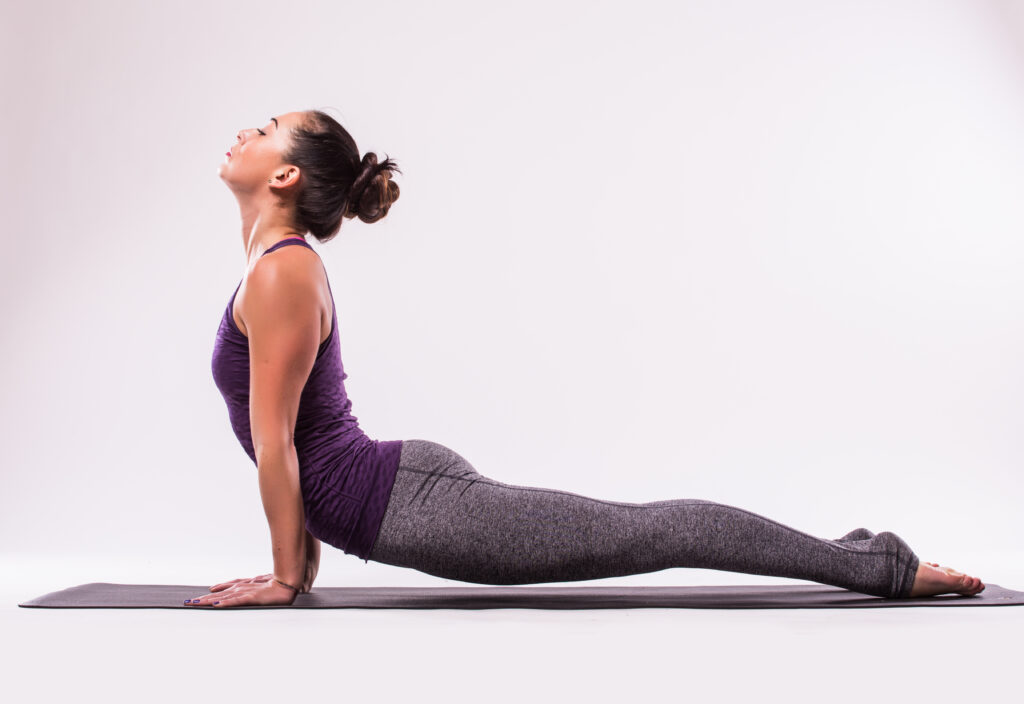
7. Bhujangasana (Cobra Pose)
How to practice
- Lie on your stomach.
- Place palms beside the chest.
- Inhale and lift the chest while keeping elbows slightly bent.
Benefits
- Makes the ovaries work better
- Makes the spine more flexible
Hold 15–20 seconds.
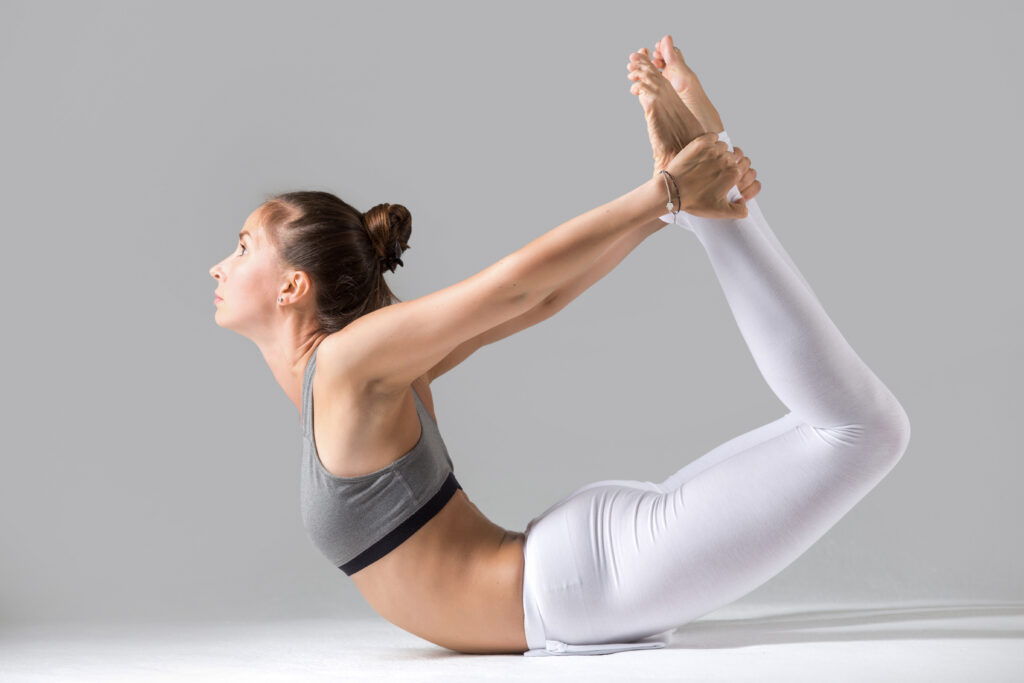
8. Dhanurasana (Bow Pose)
Steps
- Bend knees while lying on the stomach.
- Hold ankles with your hands.
- Lift chest and legs simultaneously.
Benefits
- Strong stimulation for reproductive organs
- Improves hormonal balance
Hold 10–15 seconds.
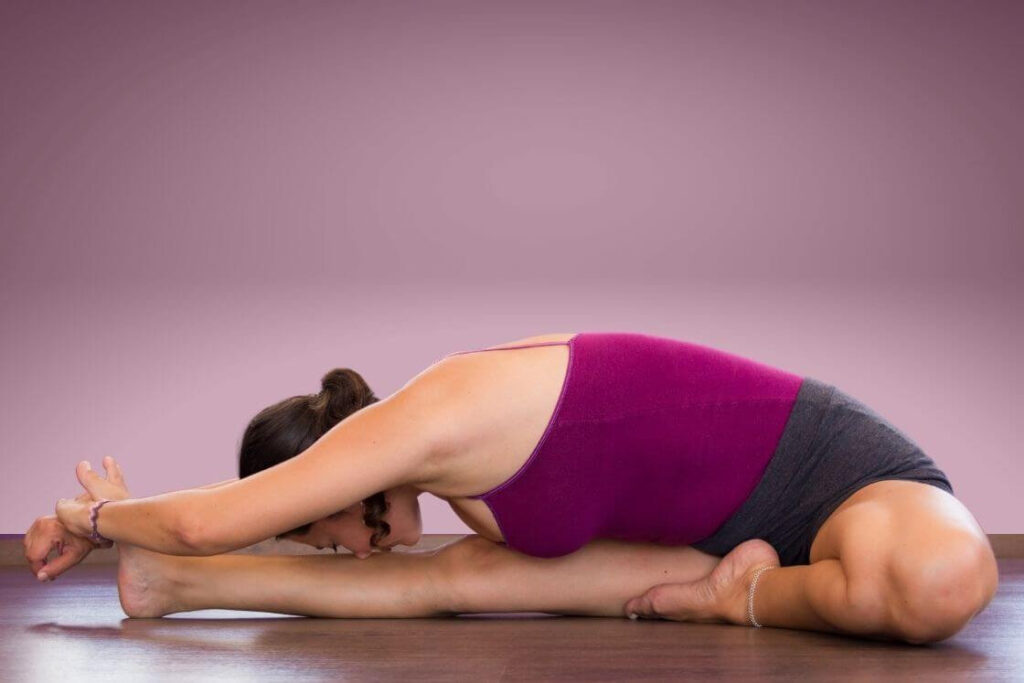
9. Janu Sirsasana (Head-to-Knee Pose)
How to do it
- Sit with one leg extended.
- Bend the other foot toward the inner thigh.
- Fold forward over the extended leg.
Benefits
- Calms the nervous system
- Improves digestion and reproductive health
Hold 5 breaths on each side.
End With Relaxation
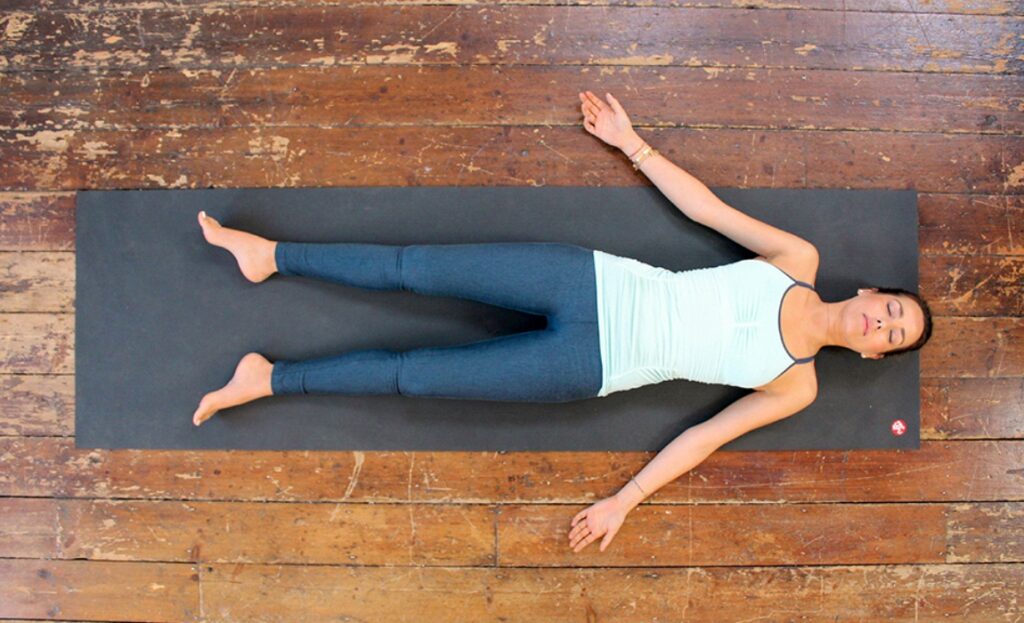
10. Shavasana (Final Relaxation)
Steps
- Lie flat on your back.
- Arms relaxed beside the body.
- Palms facing upward.
- Close your eyes.
Focus on slow breathing and allow the body to completely relax.
Stay for 3–5 minutes.
Simple Beginner Flow (Yoga for Beginners at Home Day 1)
- Kapalbhati – 2 rounds
- Bitilasana – 6 breaths
- Malasana – 5 breaths
- Baddha Konasana – 1 minute
- Chakki Chalanasana – 16 rotations
- Setu Bandhasana – 5 breaths
- Bhujangasana – 20 seconds
- Dhanurasana – 15 seconds
- Janu Sirsasana—both sides
- Shavasana—5 minutes
Total time: 20–25 minutes
Important beginner tips
- Practice when your stomach is empty.
- Take care of your body.
- It’s more important to be consistent than to be intense.
- Over time, even 20 minutes a day can help keep hormones in balance.
Is 20 minutes of yoga per day enough?
Yes, 20 minutes of yoga routine a day can be enough, especially for people who are just starting out with yoga at home and have ailments like Polycystic Ovary Syndrome (PCOS) or Polycystic Ovary Disorder (PCOD).
In fact, as mentioned in the previous section with the beginner routine, a simple 20-minute practice done daily can support hormonal balance, reduce stress, and gradually improve overall well-being.
However, the effectiveness of those 20 minutes depends on a few important factors.
1. Consistency
Consistency is the most powerful factor in yoga practice.
- Practicing 20 minutes every day is far more beneficial than doing 1–2 long sessions per week.
- Hormonal balance and metabolic improvements develop through regular stimulation of the body and nervous system.
- Even gentle daily practices like Baddha Konasana, Malasana, or Bhujangasana can gradually improve circulation in the pelvic region.
Think of yoga like watering a plant — small, regular nourishment creates long-term growth.
2. Safety
Practicing safely is essential, especially for beginners.
- Instead of intensity, focus on getting the right alignment.
- Don’t force the body or you can get hurt.
- Begin with poses that are easy for beginners, like Setu Bandhasana or Bitilasana. Then move on to deeper backbends like Dhanurasana.
- To calm your nervous system, always end the session with a relaxing pose like Shavasana.
Safe practice helps the body heal and adapt gradually.
3. Resources
The resources you use can make your practice more effective and sustainable.
Helpful resources may include:
- Guided videos or beginner yoga classes
- A yoga mat that feels good
- A place at home where you can practice in peace
- Knowing how to breathe correctly for exercises like Kapalbhati Pranayama
Good resources help ensure that your 20-minute practice remains structured and beneficial.
4. Mindset
Mindset shapes the entire yoga experience.
- Approach yoga with patience and self-compassion.
- Avoid comparing your progress with others.
- Focus on how your body and mind feel after the practice, rather than perfecting poses.
Yoga is not only physical exercise; it is a practice that connects breath, body, and awareness.
A calm and positive mindset makes those 20 minutes deeply restorative.
In simple terms:
Yes, 20 minutes of yoga per day is enough — when practiced with consistency, safety, the right resources, and a supportive mindset. Over time, these small daily practices can create meaningful changes in both physical health and emotional balance.
Conclusion
We encourage you to have an instructed session at your home, to make it comfortable for you, and to get the maximum results for your effort in yoga. Sometimes it becomes so hard to stay consistent if it’s just you working at your own pace and your own time. But the yoga instructor can help you stay consistent without any problems. You pay the money,y and you take classes for that sake. And improve over time, see results get better, and then you can stay consistent without much effort.